Last Updated 08/31/2006
Symptoms that you need to do this
- Your Xenon headlight(s) point at the ground right in front of the car
- Your headlights move all over when you hit a bump
- The manual adjuster no longer moves the light up/down or left/right
Tools required
- An interchangeable bit screwdriver
- A 5/16" socket (this is probably really 8mm)
- A 1/4" socket adapter so you can use the socket on the screwdriver.
- A Torx 20 bit for the screwdriver
- A Torx 10 bit for the screwdriver
- A flat bit for the screwdriver
- A pick tool to remove the old plastic parts
- A can of compressed air for cleaning
- An optical microfiber cleaning cloth (get it at a camera store for $4).
- Needlenose pliers.
Parts required
- A set of adjusters for each headlight you intend to do. They come in a set from the dealer or from Pelican Parts for $10.50. This is enough to both adjusters in only one headlight. Get two sets (4 parts) total.
Time required
It took about 2 hrs for the first one, and about 30 minutes for the second one I did.
Important Notes
Don't force anything. If you break something, there are no replacement parts available. Really.
I am not going to accept responsibility for anything you do to your own car. I didn't charge you for this advice. Please treat it as such.
These instructions are for non-Angel Eyes headlights only. Don't ask me for repair instructions for headlight types other than Non AngelEyes Xenon headlights.
Step 1: Remove the headlight from the car. This is just held in place by two bolts on the top, and two on the bottom, behind the lightbulb assemblies. Pull it out, unclip the turn signal and three other plugs.
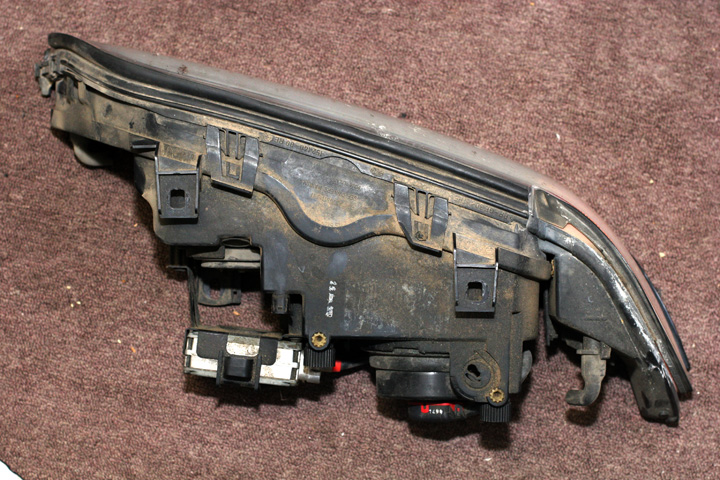
Step 2: Clean it off outside before disassembling. This will prevent dirt from contaminating the reflectors. Use a brush, compressed air, some windex and paper towels, whatever.
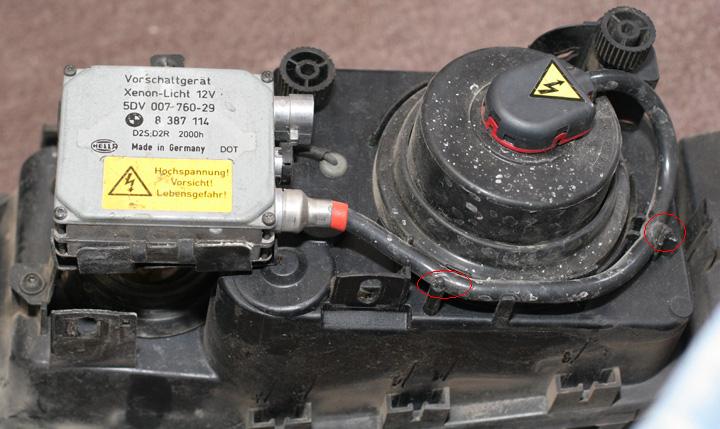
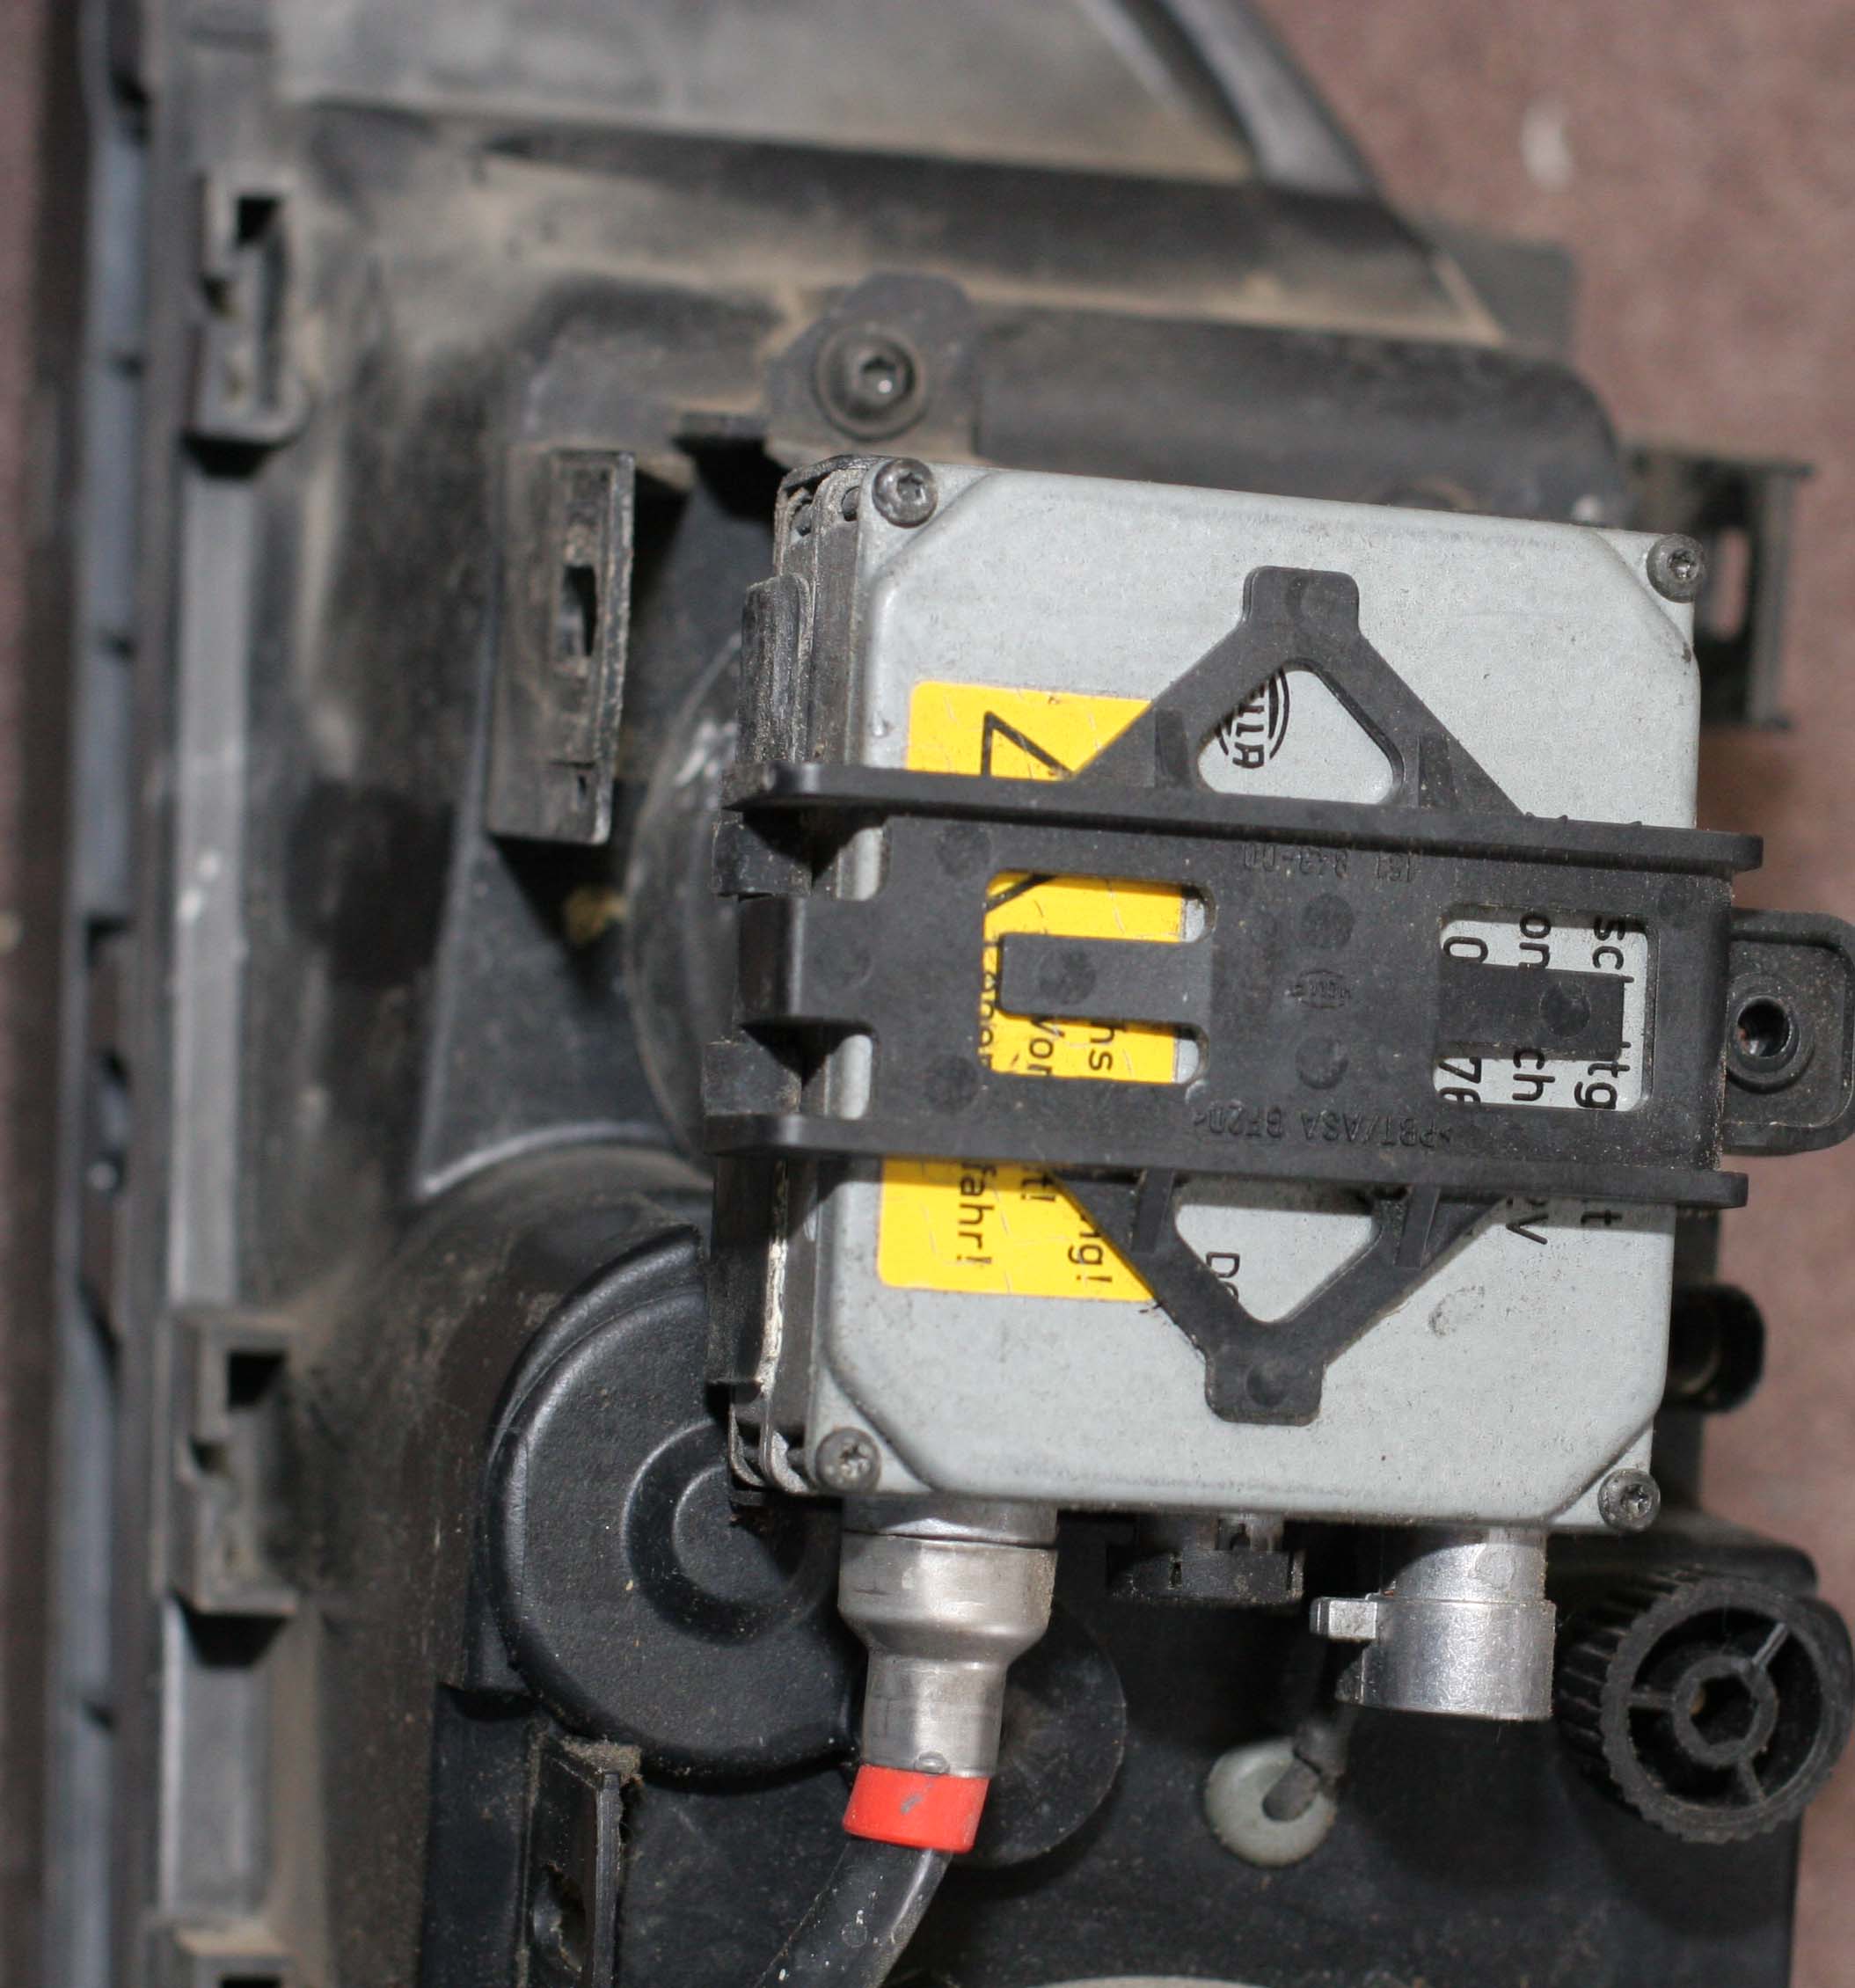
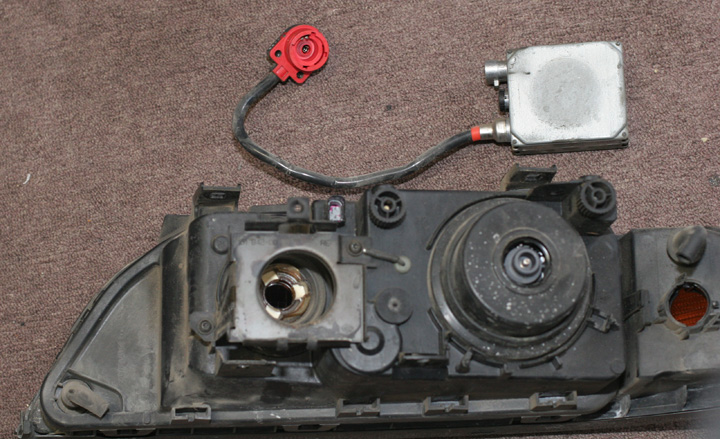
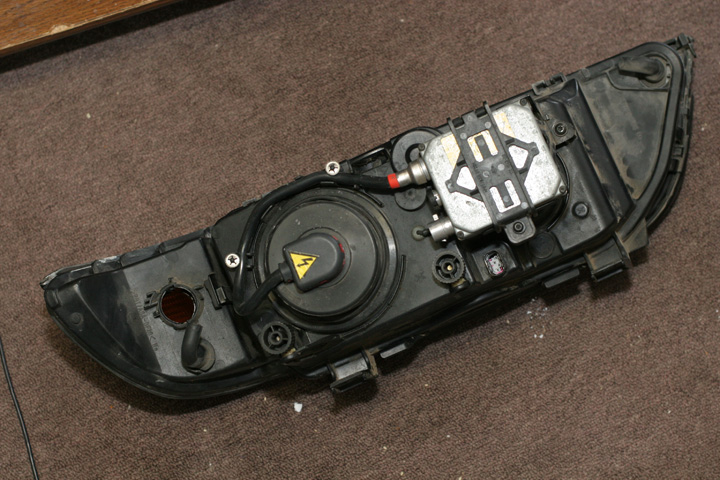
Step 3: Remove the high voltage power supply. Pry off the two star washers holding the cable in place with a flat blade screwdriver. Remove the plastic bracket holding the metal box in place. Turn the lightning bolt plug and remove it. Remove the metal box, wire and plug.
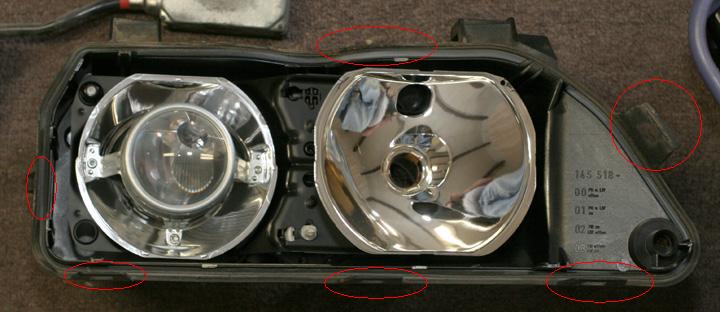
Step 4: Unsnap the 6 plastic snaps holding the light together. Be careful with these. No need to stick it in an oven, just use a flat blade screwdriver and pop them loose.
Step 5: Pull the two halves of the case apart.

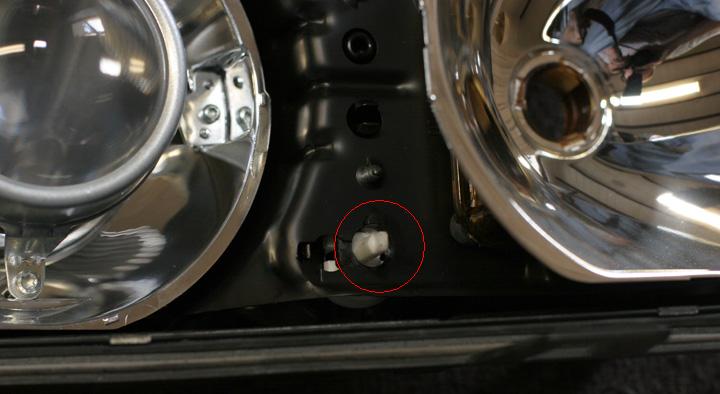
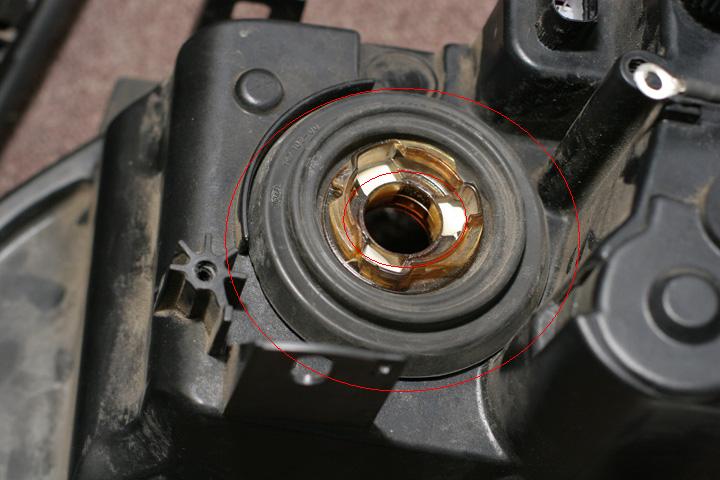
Step 6: Locate the electric headlight adjuster screw (white plastic thing, hexagonal in shape, with a flat screwdriver shaped end) and turn it 1/4 turn with a socket or some needlenose pliers. Be careful. I used a pick tool from the back side to help turn this piece.
Step 7: If they're not both broken loose (they were on mine), turn the manual adjusters until the plastic adjusters are all the way off the manual adjuster bolts. Remove the reflector plate. Unclip the ground wire - there's a release clip on the bottom side of it. Separate the reflector plate from the adjuster assembly.
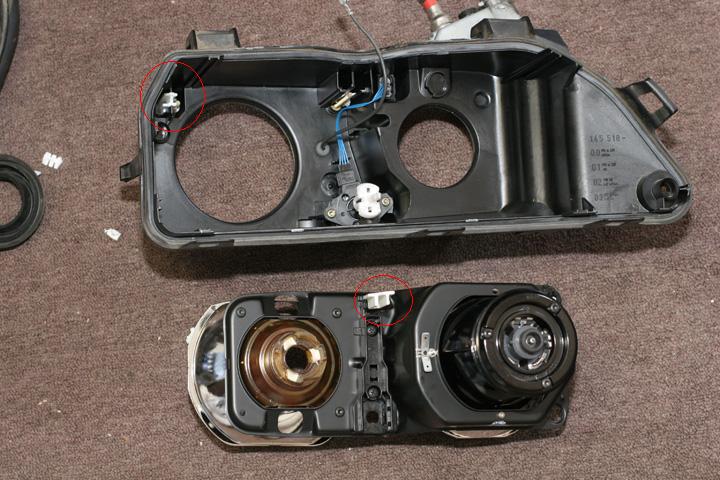
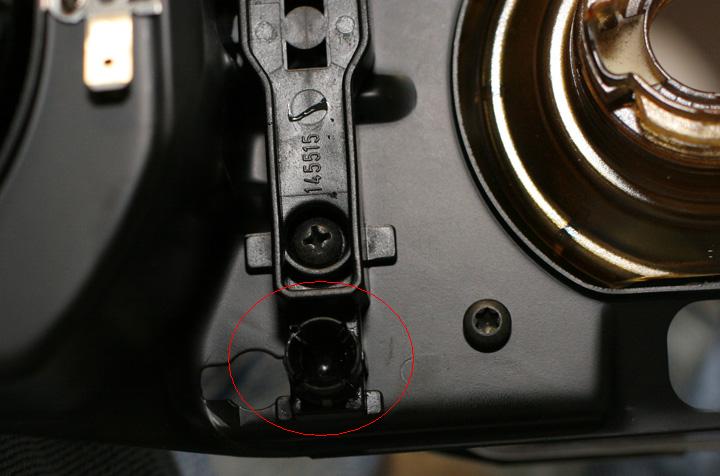
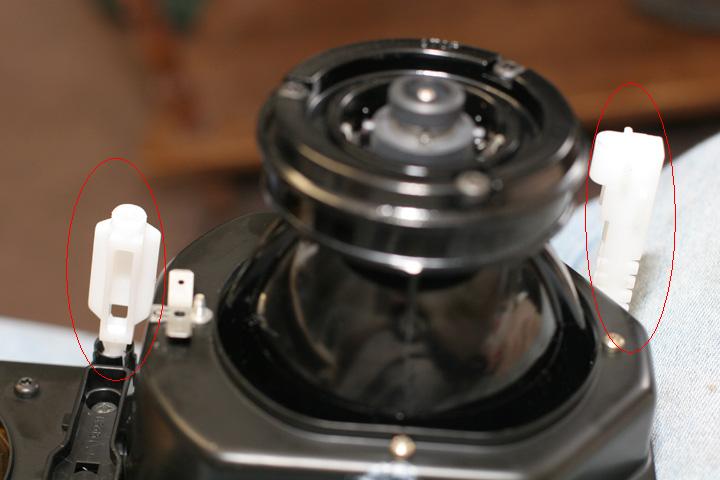
Step 8: Remove all the old pieces of broken white plastic that used to be adjusters. See below:


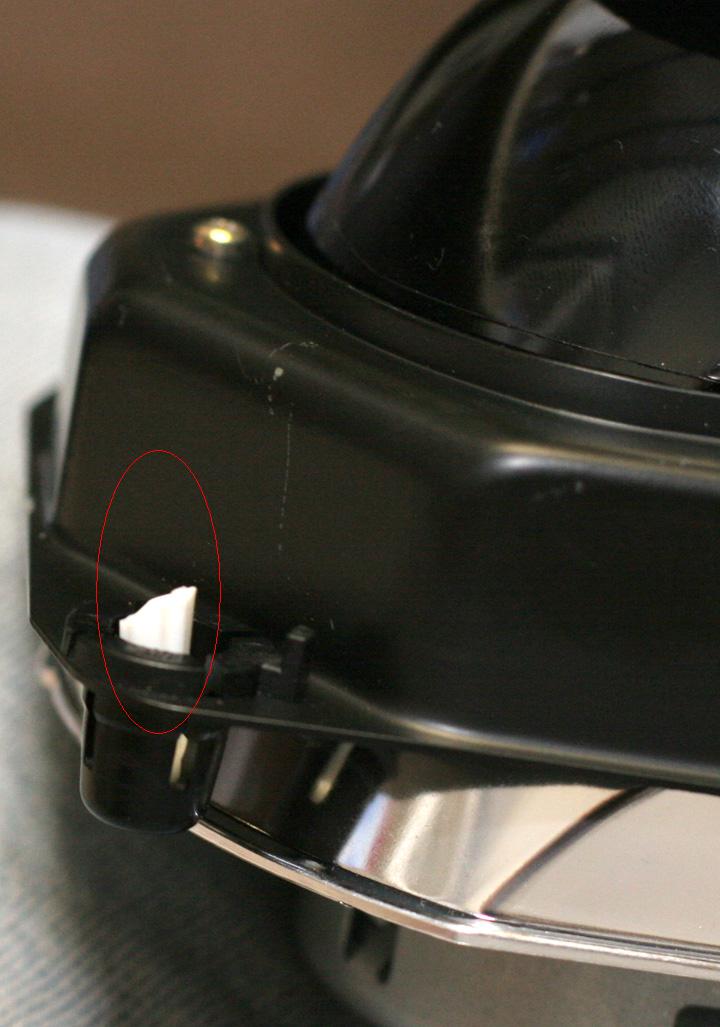
I used a pick tool to pry the old plastic out of the ball joint cups. This is what it should look like when you're done:
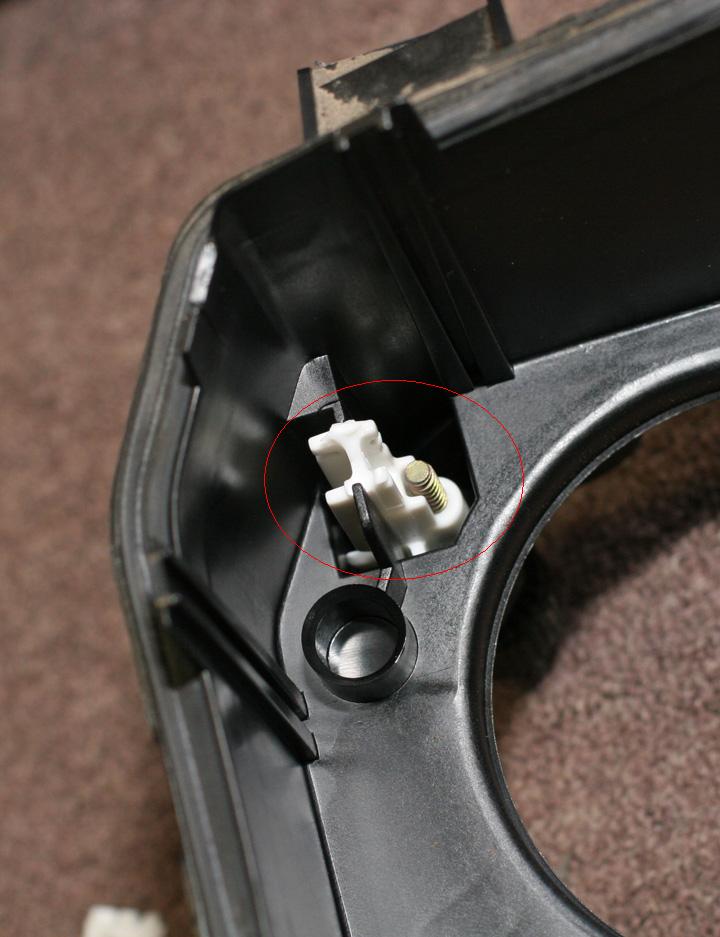
Step 9: Install the new adjusters
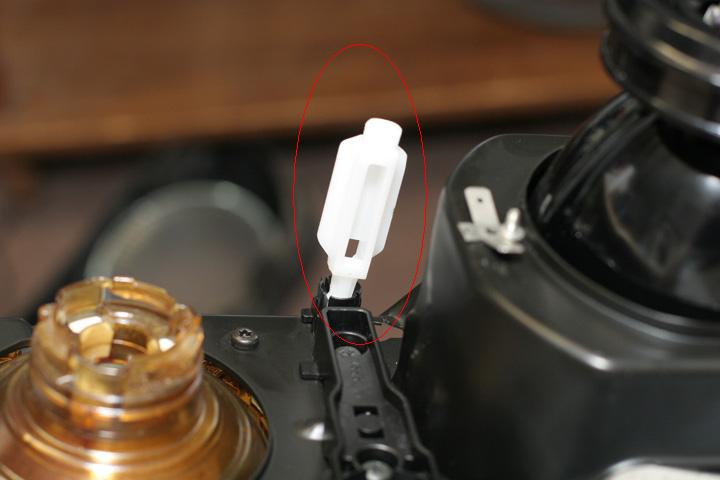
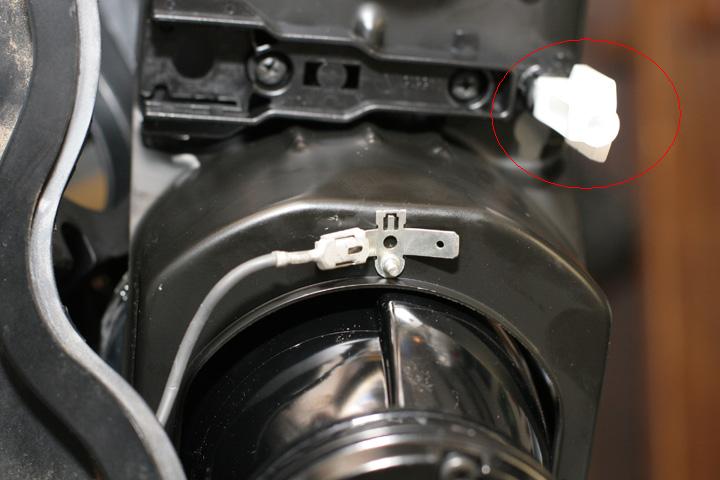
Note the direction in this photo of the passenger side. This is how the adjusters need to be turned when the reflector plate goes back into the adjuster assembly.
Step 10: Put the reflector plate back into the adjuster assembly. Screw the manual adjusters a few turns at a time, alternating between the up/down one and the left/right one. Keep turning them until the electric adjuster screw (white hex thing) drops into place. Turn the electric adjuster 1/4 turn to lock it into place. Use the pick tool as needed to assist with turning this piece.
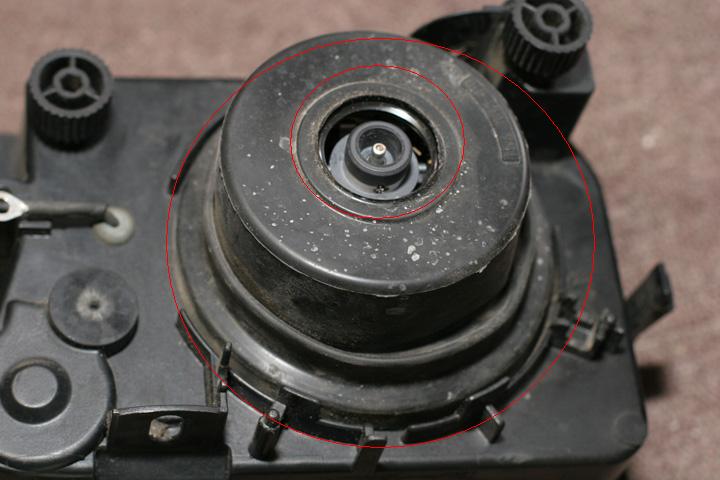
Step 11: Clean the reflectors if you think they need it. Remove the three torx bolts and remove the projector lens. Do not use paper towels, real towels, your sweaty shirt, or anything other than a can of compressed air and an optical cleaning cloth to do this. Reinstall the projector lens.
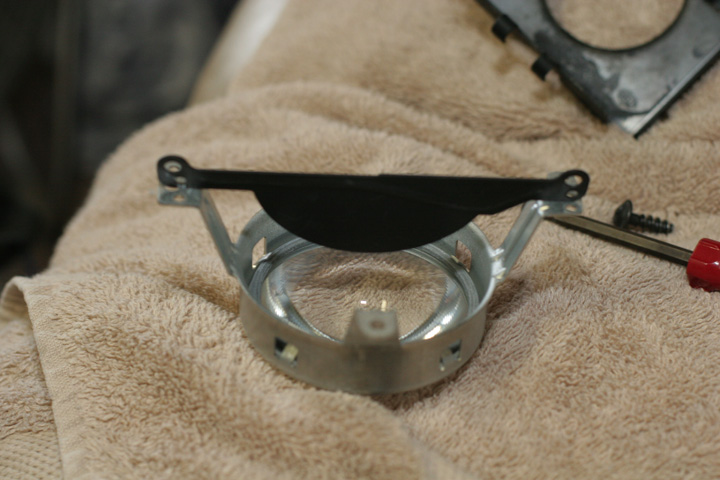
Passenger side - the black plate is the shield that makes your lights have that funny stepped shape.
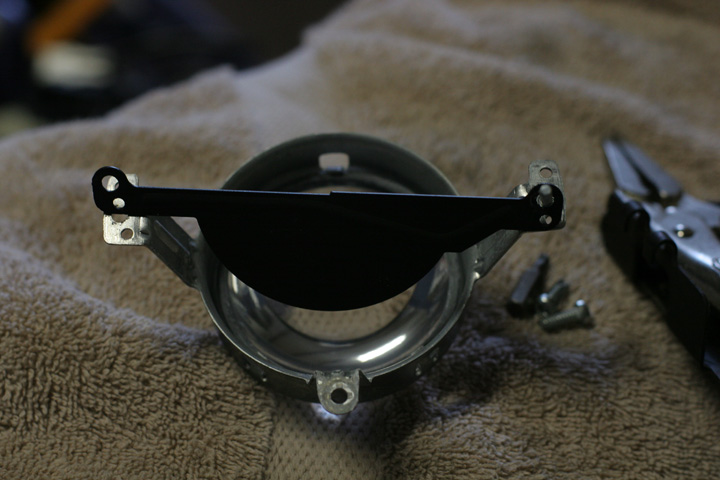
Drivers side blocker plate
Step 12: Reinstall the rubber boots on the rear of the lamp assemblies. Make sure that the center of the boot snaps into place around the light socket first, then make sure that the outer ring snaps into place around the plastic housing. This is how they look when they're right. Don't worry about folds in the rubber - they may look different depending on how the lights are adjusted.
Step 13: Snap the two halves of the lamp assembly together again.
Step 14: Reinstall the metal box (high voltage power supply). Be sure to attach the ground wire under one of the screws that hold the metal frame for the power supply. Reinstall the two star washers that hold the HV wire in place.
Step 15: Reinstall the headlight assembly on the car. Be sure to reinstall the turn signal bulb and connect the three other connectors. Be sure that the headlight matches the body lines before closing the hood or damage may occur.
Step 16: Realign your headlights using procedures readily available online.
Step 17: You're done! If anything you found here helped you to solve a problem that you were having, please consider donating a few bucks to help me offset the cost of making these instructions available for free. Click here for Donation info
Thanks, and good luck.
[an error occurred while processing this directive]