Coleman Deluxe Twin Tube (Large Tube) Lantern - Review and Modifications
Last Updated 2/15/2003
[an error occurred while processing this directive]Overview
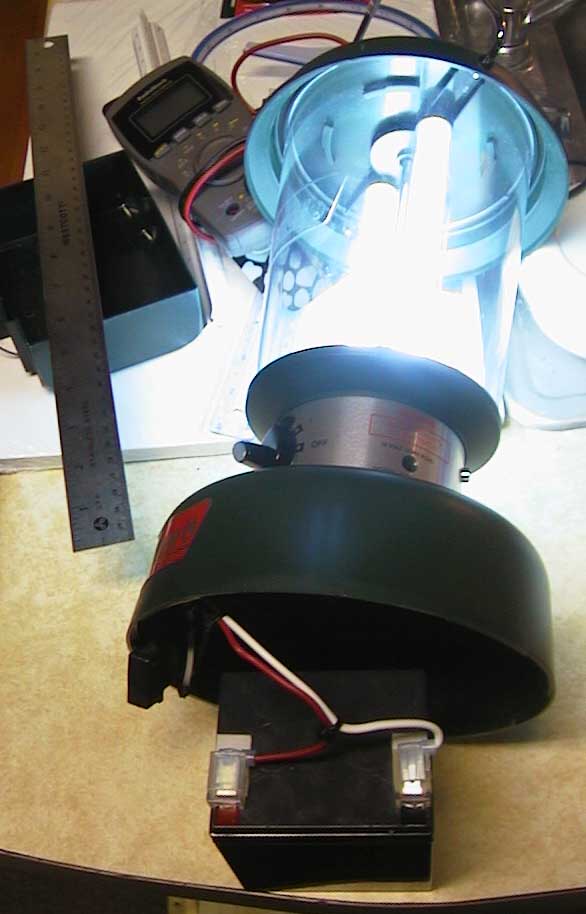
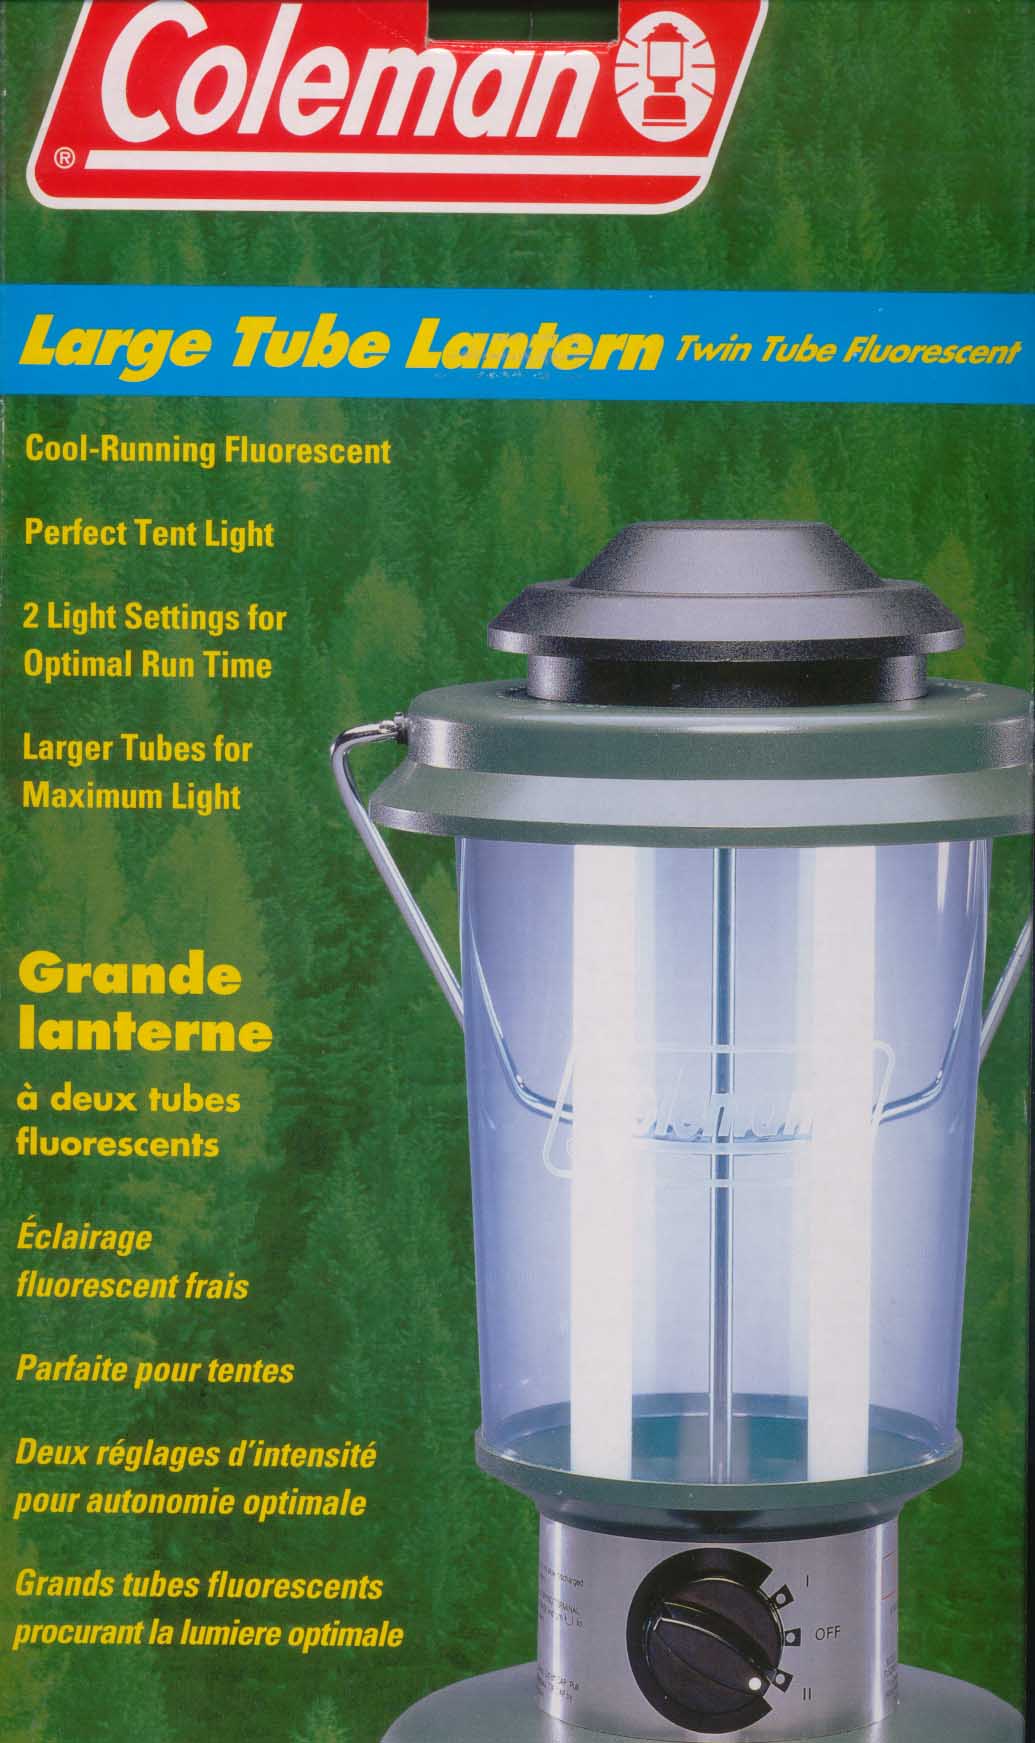
The Coleman Large Tube Fluorescent Lantern is lightweight and can run for 24hrs on one set of batteries. I chose this because it offered two large tubes and was lightweight. It's great for campers or as a long-running, safe, portable emergency light source. I'll review mine and show how to modify it for a rechargeable Sealed Lead Acid battery.
Review of My Lantern
It's lightweight and has two 9" 6W fluorescent lamps. It comes with two adapters that allow the lantern to be run from either two 6V Lantern batteries or eight D cell batteries. It also has a 12V input jack that would allow it to be run from a 12V DC source (the required cord is not supplied), but that jack can't be used to recharge batteries - it's just for powering the lantern.
The box says that it can run continuously for 24 hrs on one tube or 18hrs on two tubes, or for 32 hrs on one tube or 22 hrs if used for 2-3hrs/day.
Measured current draw and power consumption numbers are shown below:
Off - 0.000A (0.000W) so it can be stored with the batteries in it
1 Tube On - 13.08VDC terminal voltage, 0.48A (6.2784 Watts)
2 Tubes On - 13.08VDC terminal voltage, 0.745A (9.7446 Watts)
As you'd expect for anything that costs $20, it's constructed mostly of cheap-ass plastic. The bulbs are held in with a twist-lock cap that doesn't have to be turned very far to pop off (I can't even get it out of the box without the cap flying off and the bulbs falling out). The plastic bottom is the same way - turn it 10 degrees and it flies open and drops the batteries on the ground. Inside isn't great either - they use cheap fragile wires from the battery box to the circuit board and a rotary switch that will probably fail with some use.
The manual says that you may not be able to use it in two-tube mode if it's below 20 degrees F. I tried, and you have to have two working tubes in place even if you use it in one-tube mode or it won't light at all. The manual also says that the tubes will blacken if you use the lantern when the batteries are mostly discharged and the lamp is dim.
Modifications
Replacing the Batteries with Rechargeables
Coleman makes rechargeable lanterns, but they weren't as lightweight and didn't have the same light output as the Deluxe Twin Tube (formerly called the Large Tube) Lantern and didn't run as long as this one, so I chose to modify this one instead.
Dry cell batteries are too expensive. Rechargeable NiMH D cells would have cost $150 with a charger. I looked around and found some batteries I'd removed from a small UPS. They're 12V 6AH deep cycle sealed lead acid batteries that are also used in ride-on motorized toys. Based on the info above, it should run for 8-12 hrs per charge and recharge in about 6 hrs.
1) It won't fit without removing the battery box (2 screws, then cut or unsolder the wires connecting the battery box to the circuit board).
2) Remove the knob (it's lightly glued).
3) Remove the 1 screw holding the circuit board into the lantern, then remove the circuit board.
4) Unsolder the factory wires if they're not broken already (they suck).
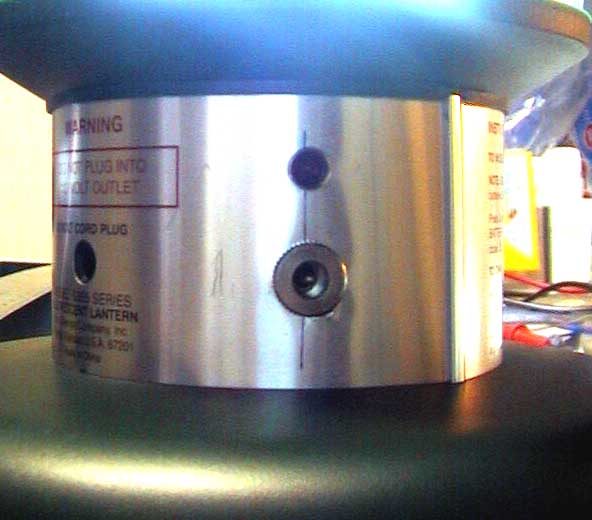
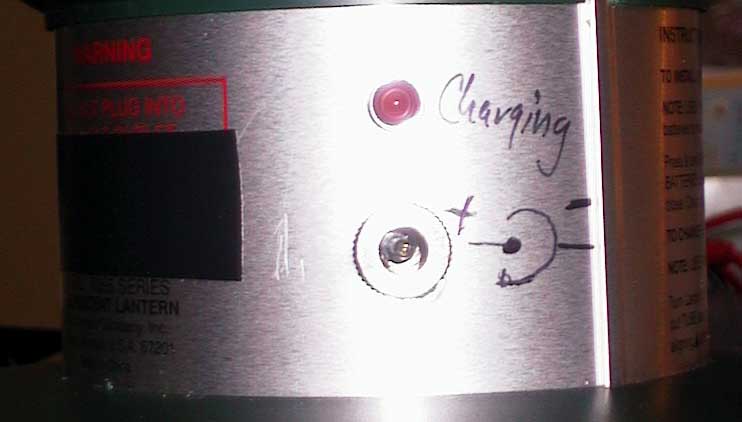
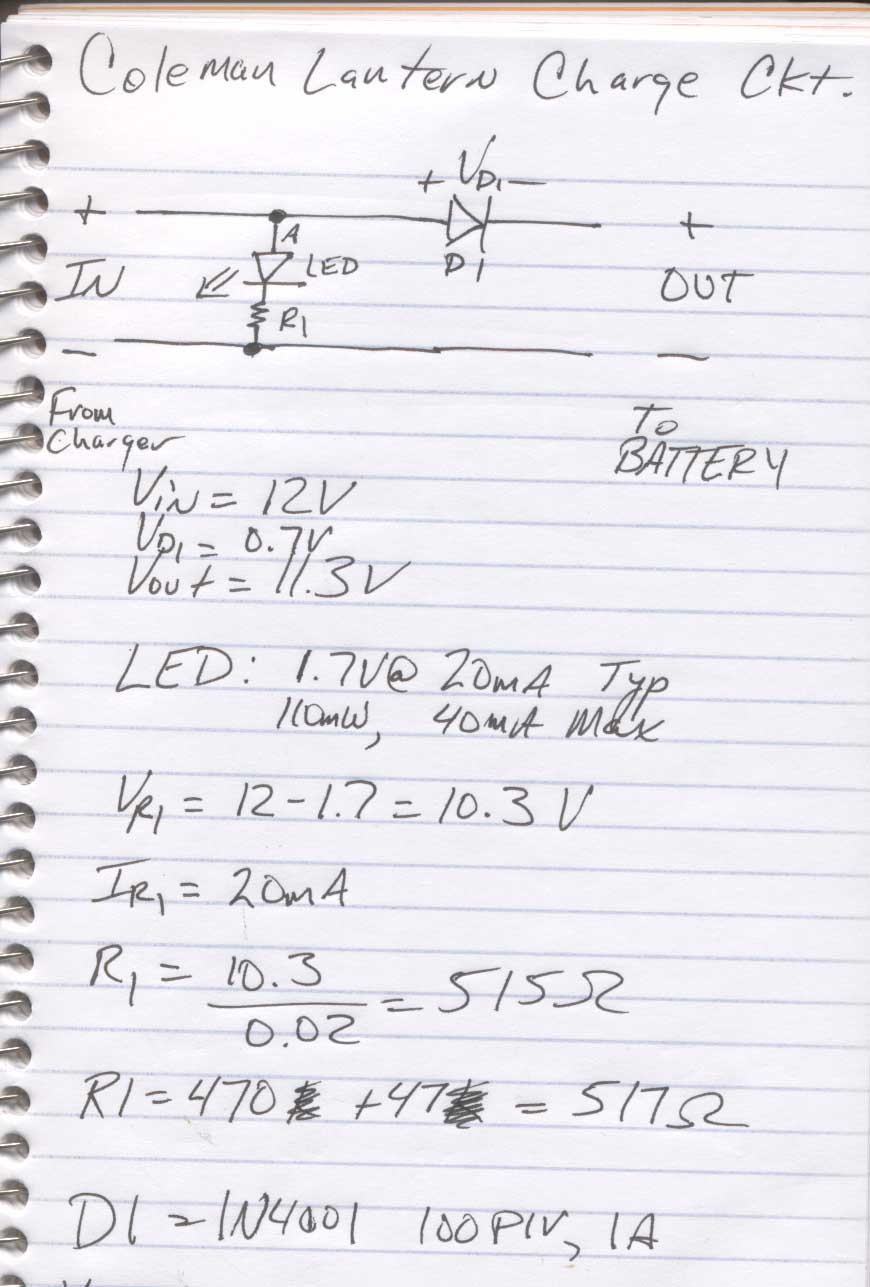
5) I wanted to recharge the lantern without taking it apart, so I designed this charging circuit to build into the lamp:
It's just a diode in series with the power supply and an LED to indicate charging power. D1 keeps the battery from discharged if the power supply is attached but not plugged in, and it keeps the indicator LED from discharging the battery when the power supply is not attached.
Parts List:
1 - 1N4001 1A, 100PIV diode
1 - 470 Ohm 1/4W resistor
1 - 47 Ohm 1/4W resistor
1 - Panel Mount LED - 1.7V, 20mA typical specs
1 - 12VDC, 1000mA Wall Adapter
1 - Panel Jack to match Wall Adapter
1 - CSB HR1221W F2 12V 6AH Sealed Lead Acid battery
1 - 3" square Velcro to hold battery in place
1 - Automotive Fuse Holder
1 - 5A fuse for above
Misc - Wire, solder, heat shrink, etc
Build the circuit shown as shown above. Drill two holes in the locations shown and install the LED and Panel Jack. Connect everything to the new battery and circuit board.
Keeping the top and bottom plastic pieces in place
Tape the bottom as shown with electrical tape. After it's been modified for rechargeables as shown above, it isn't necessary to remove the bottom, so it could be glued, too.
The top was harder - I couldn't get tape to stick, so I used some silicon glue to seal the top. The tubes are supposed to be good for 1000 hrs, so unless you use this a lot or drop it, you shouldn't need to remove the top too often.